
Payouts helps your business manage and pay vendor invoices — locally and internationally — without the manual back-and-forth. Forward a bill, review the details, schedule the payment. That's it.
Supported payment modes: Local bank transfer, JomPay, and Foreign Disbursement.
See how many bills each plan includes →
Watch a quick overview of how Payouts works, or scroll down for the full step-by-step breakdown.
Bill Capture
Forward any PDF, Excel, or Word invoice to bills@swipey.co and it will automatically appear in your Payouts board, ready for review.
Things to know
Managing Bills
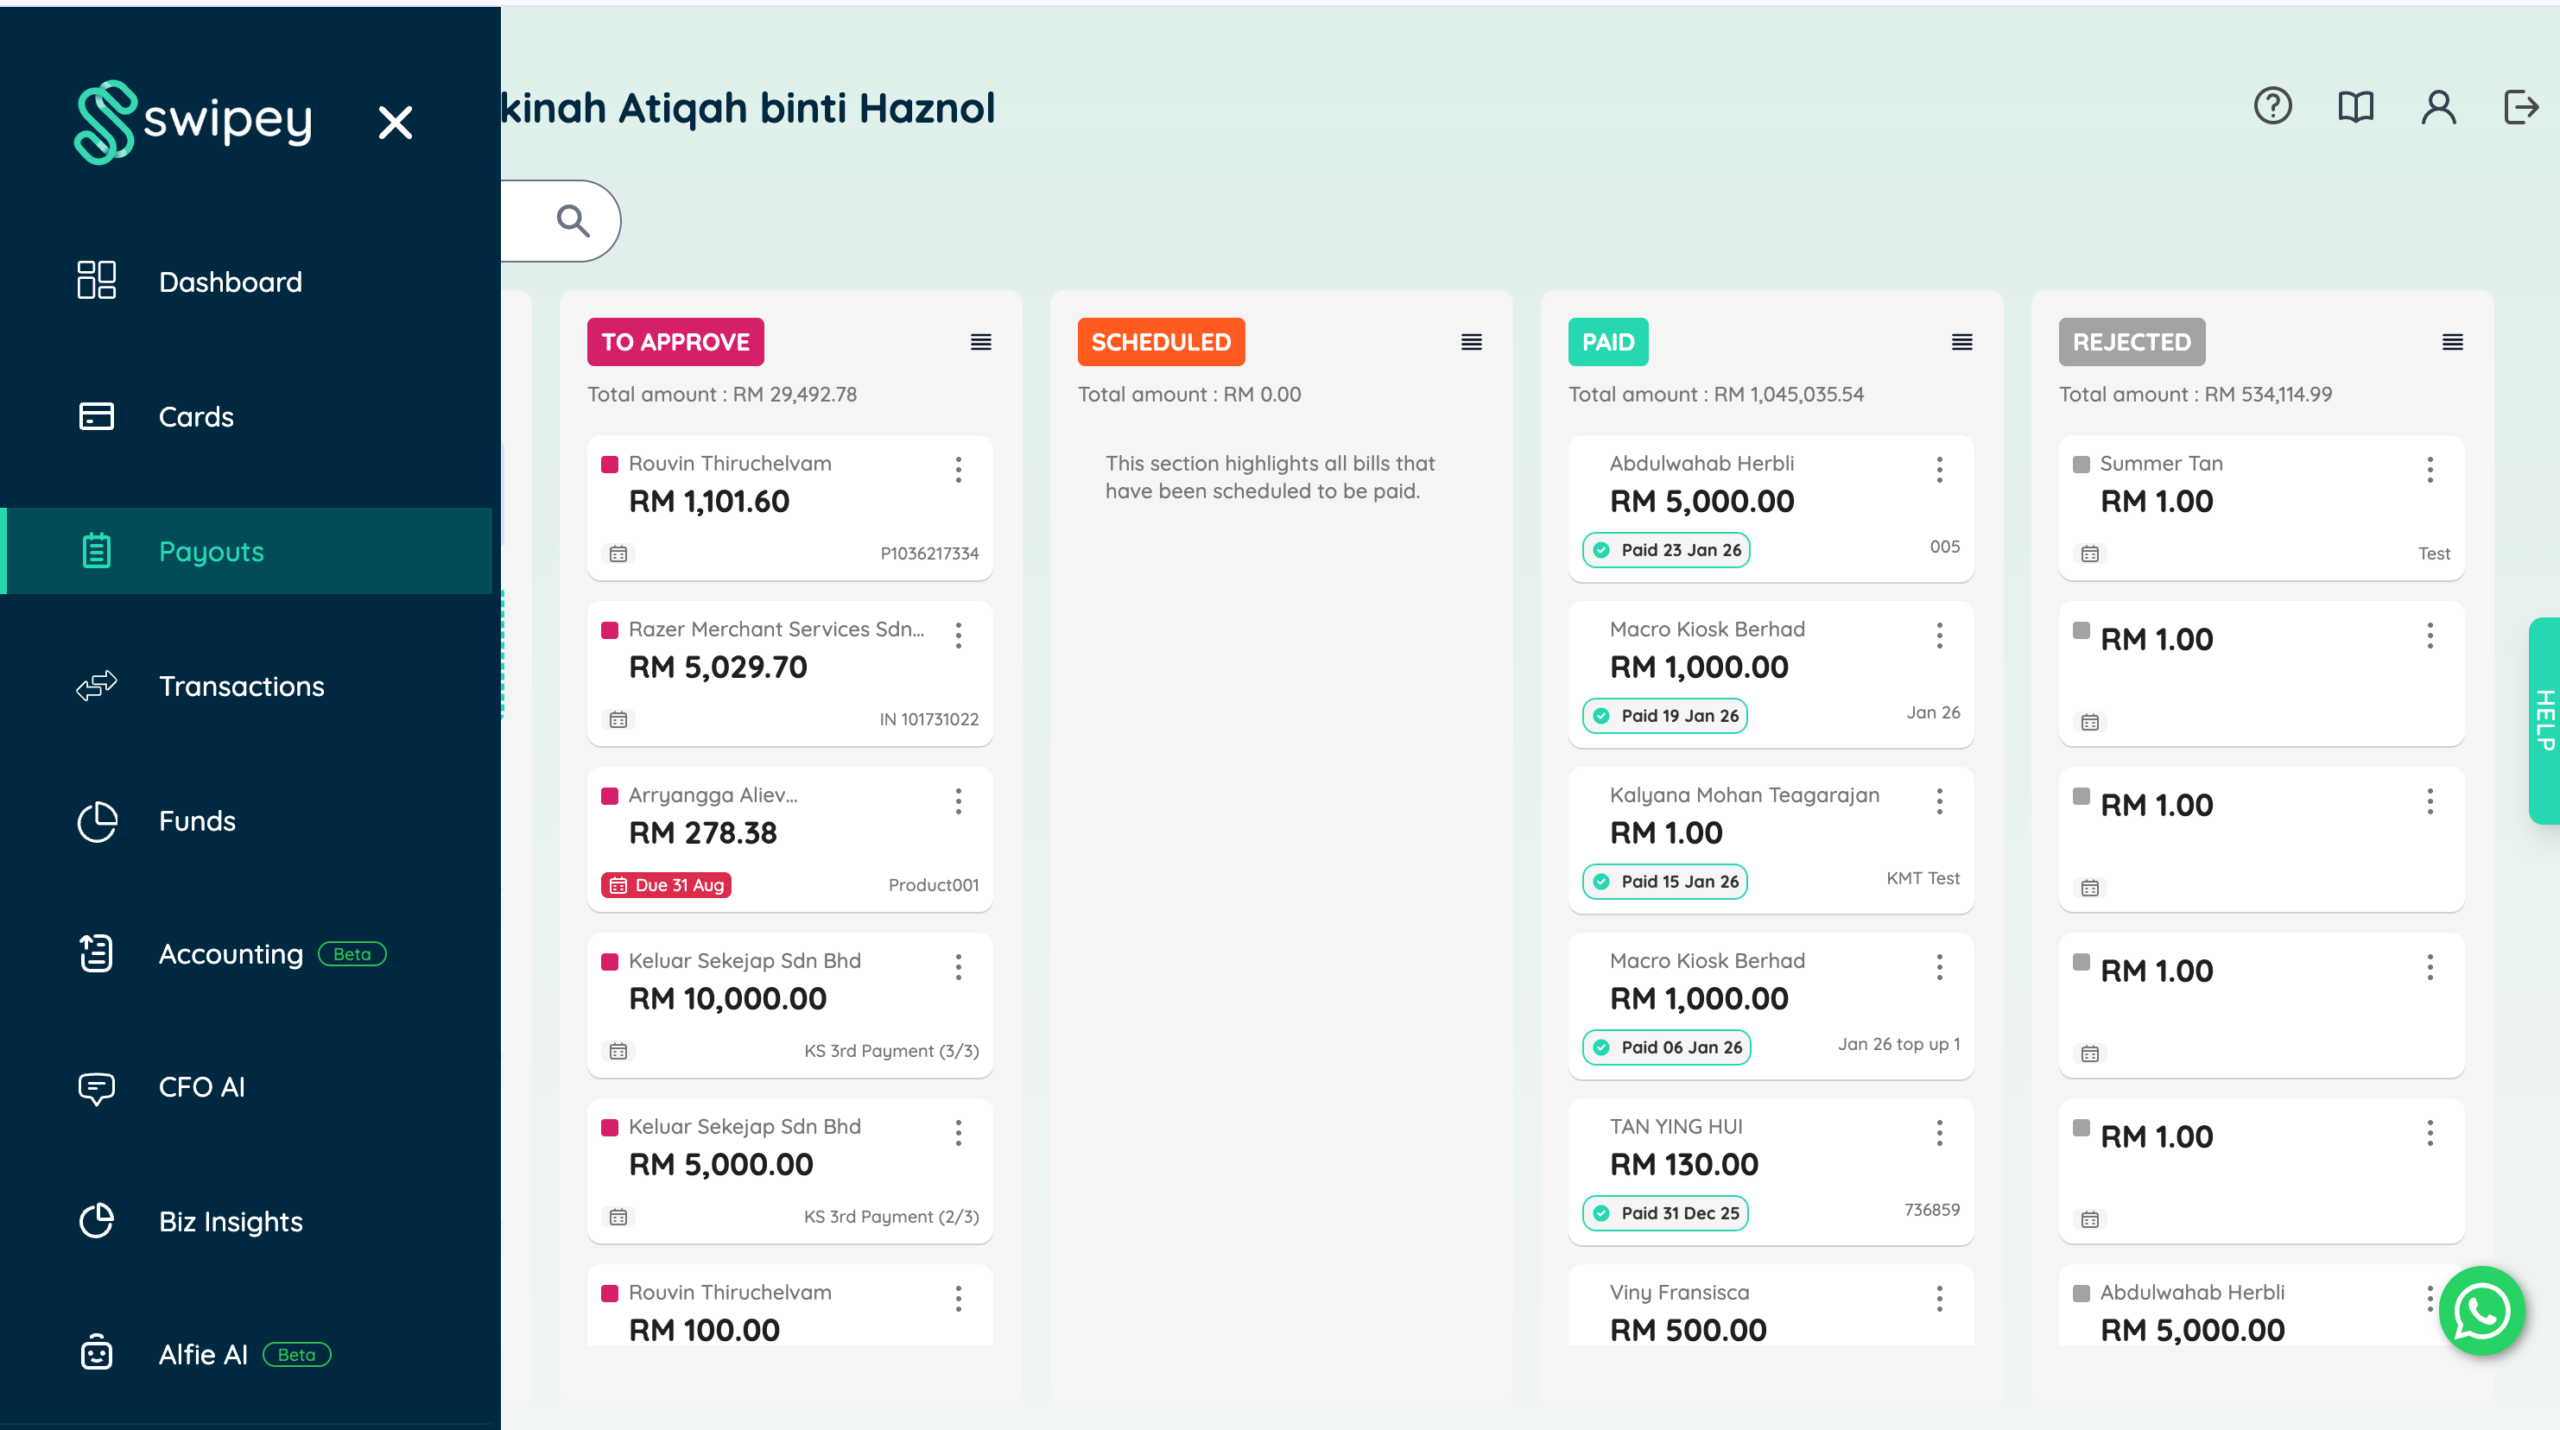
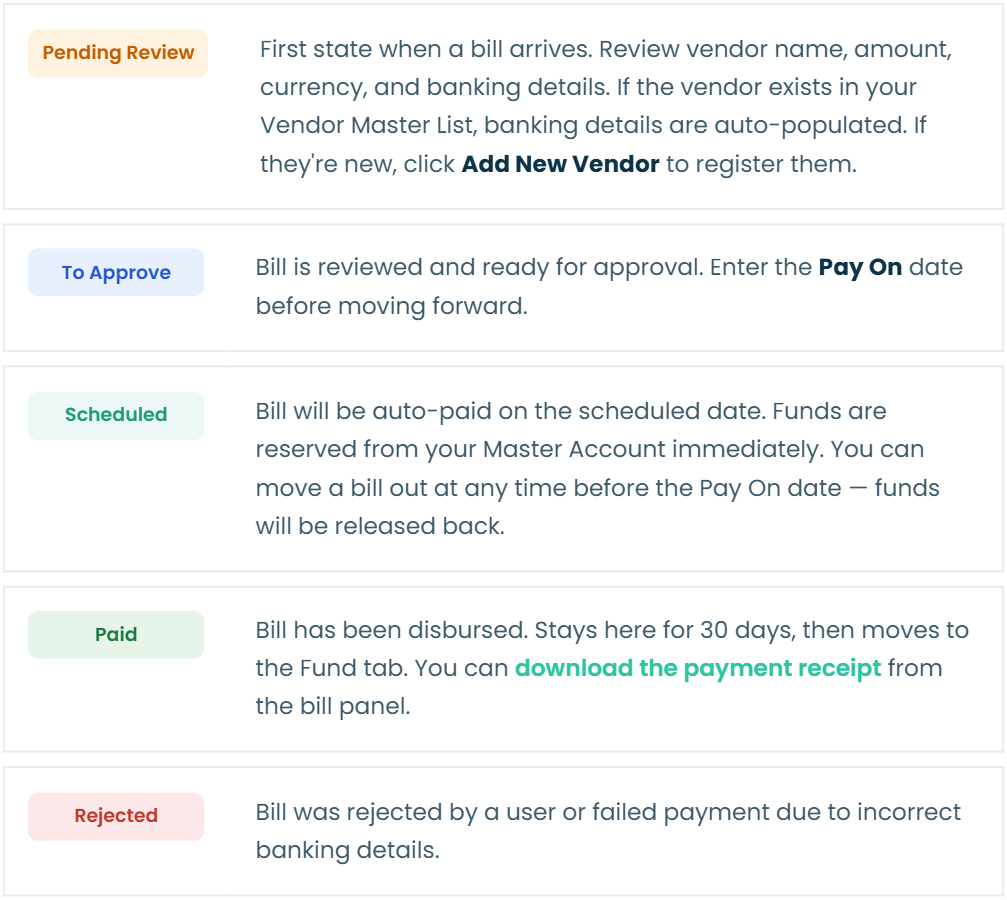
Bills move through a 5-stage Kanban board. Each stage represents where a bill is in its lifecycle so every bill can be managed and approved before payment.
What to check when a new bill arrives
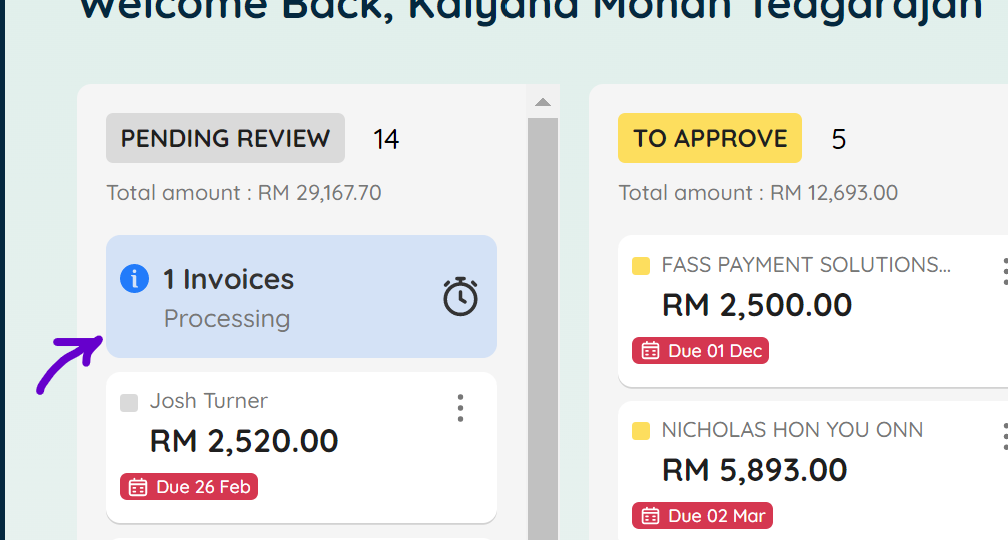
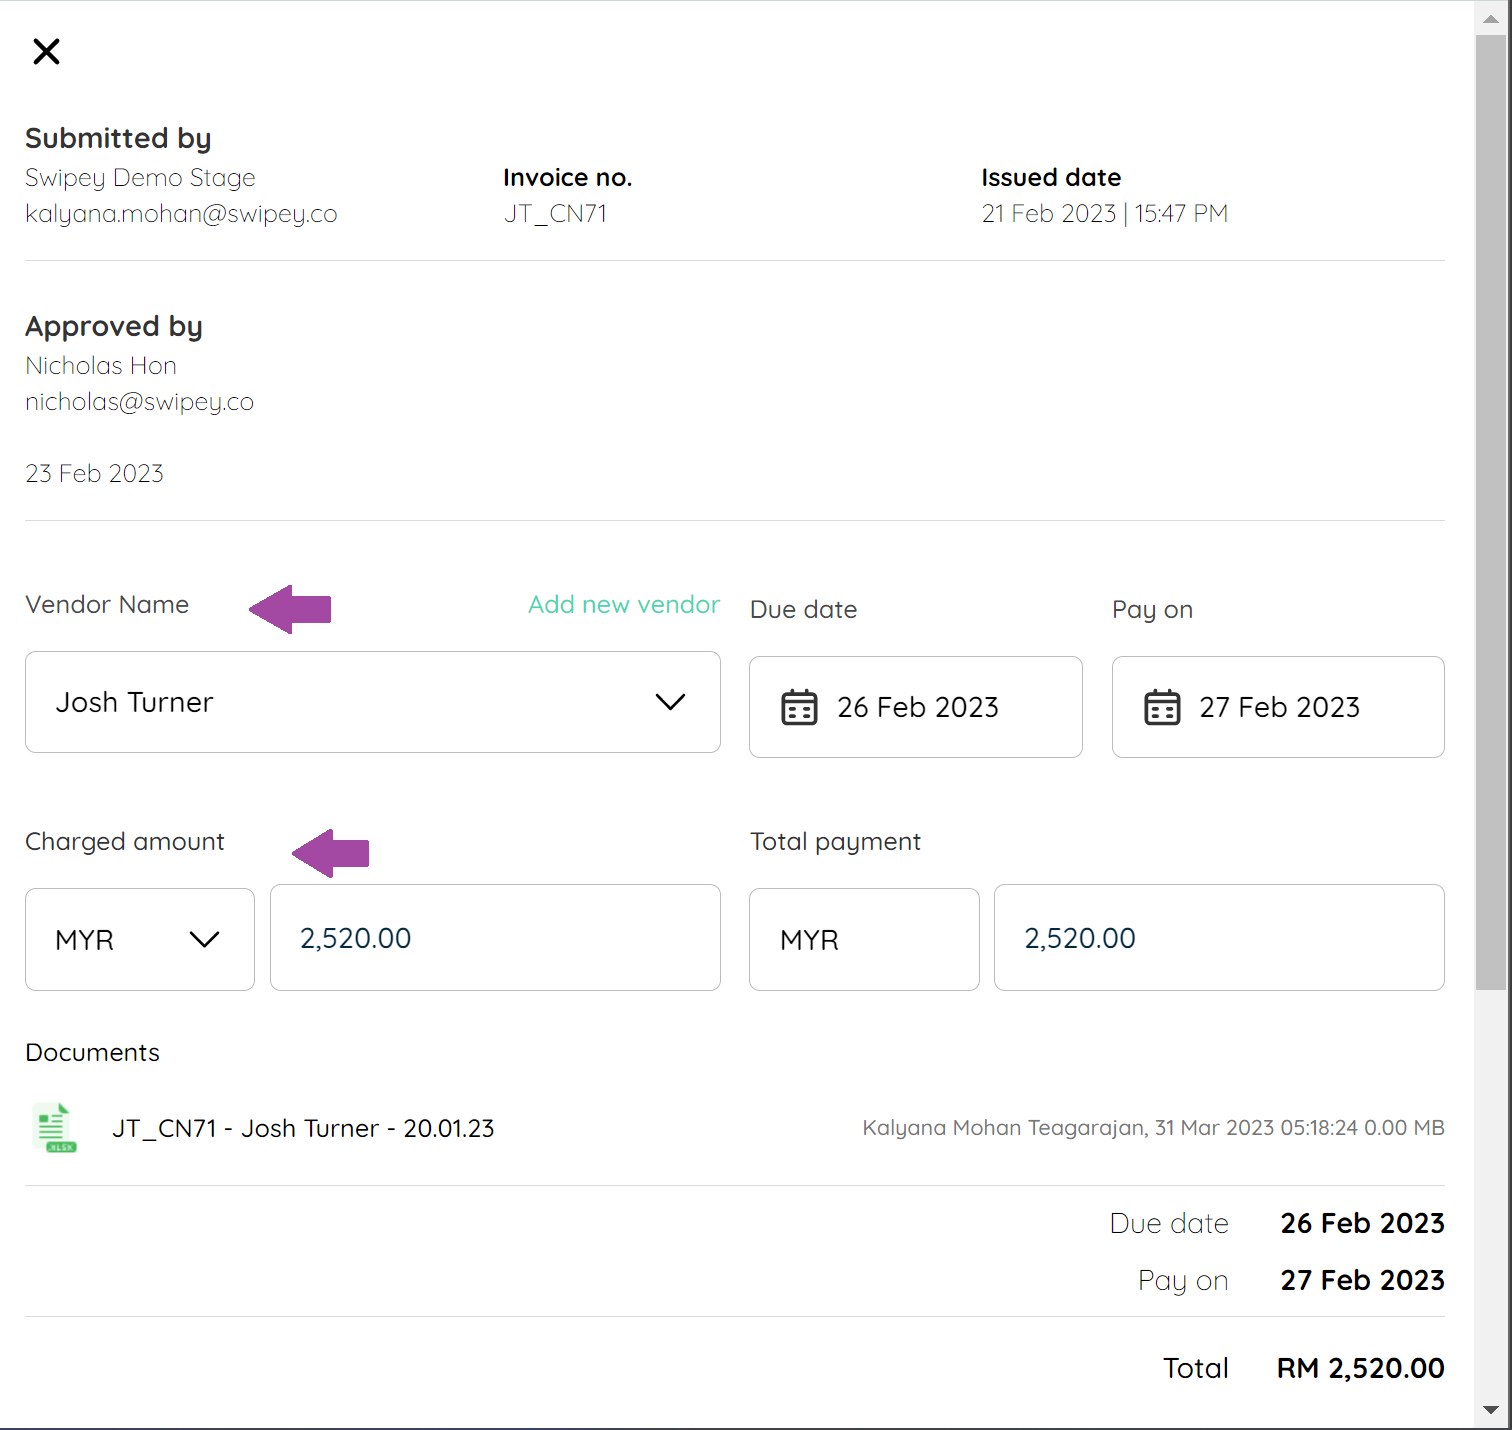
All new bills land in Pending Review. Swipey reads the invoice and pre-fills the details — but verify everything before moving forward.
Review checklist
Once everything looks good, click Mark As Reviewed inside the bill, or change the status from the dropdown on the tile.
Vendor Management
When Swipey captures a new vendor's bill for the first time, you'll be prompted to add their details. Repeat vendors are auto-populated from your Vendor Master List.
Adding a vendor for the first time — 2 ways:
Option 1
From the bill page
Open a captured bill from the Payouts board and click Add New Vendor to fill in their banking details directly.
Option 2
From Settings
Go to Settings → Vendor → Add New Vendor to register a vendor at any time, even before a bill comes in.
💡 Once a vendor is saved, you can add their email so they automatically receive a payment receipt when their bill is paid. Learn how to set this up →
Managing Foreign Currency
Swipey auto-detects the currency on the invoice. Supported currencies:
+ payouts to 100+ countries. Rates on the Swipey dashboard are indicative. Read more about the Lowest FX Rate Guarantee → Reach out if your bill currency isn't listed above.
Scheduling & Making Payment
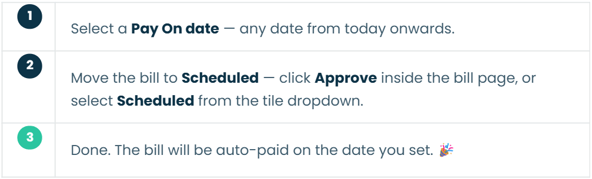
Once a bill is reviewed and approved:
Payment cut-off times (GIRO)
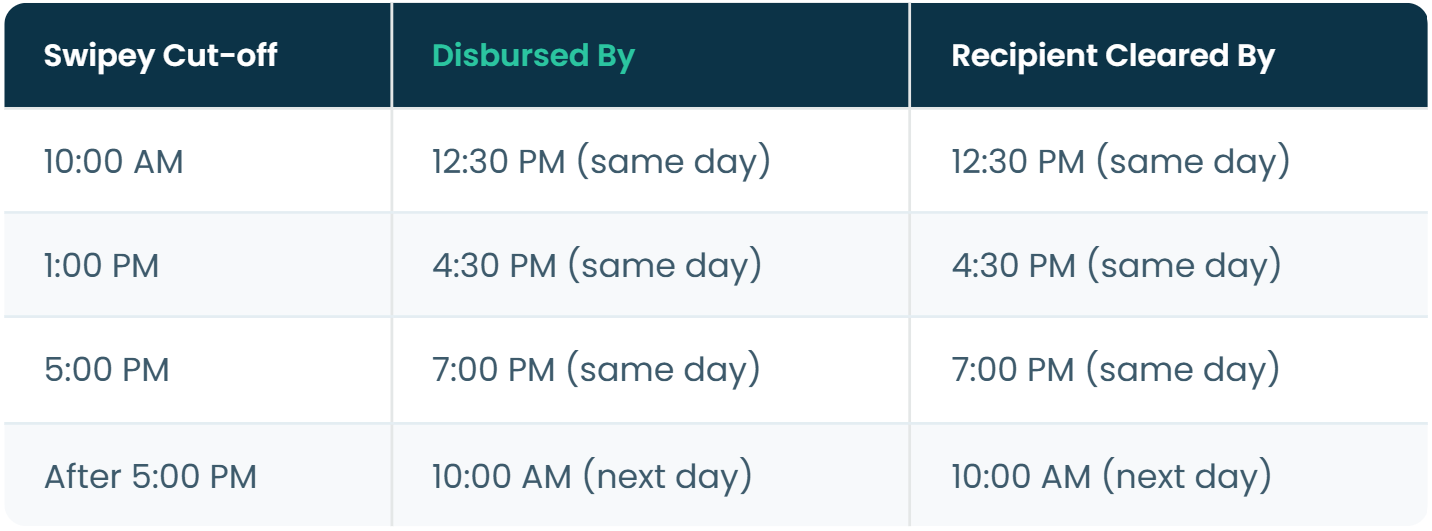
⚠️ Scheduled payments will not be processed on weekends or Malaysian public holidays. Cross-border payments clear within 1–3 working days.
Learn more about payment cut-off times & processing schedules.
Things to know about payouts
📋 Paying multiple vendors at once? Learn how to create bulk payments via Payouts →