
Tag every transaction with what your business actually tracks, whether that’s the project, department, client or cost centre, right inside Swipey. No more side spreadsheet.
💡 Why use custom fields?
Every finance team reports on spend a little differently. Custom fields add your own columns to the transaction table, so the context lives right next to the spend, and every field comes through in your Excel export ready for your reports.
What you can create
| Field type | Best for | Example |
|---|---|---|
| Dropdown | A fixed list of options, so everyone picks the same way | Department: Marketing, Sales, Operations |
| Text | Anything that changes often | Campaign name, PO number, event |
🔜 Number, Date, Checkbox and Member fields are coming soon.
➕ Create a custom field
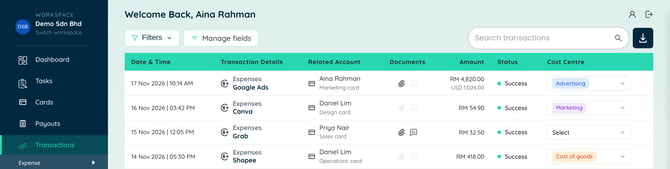
- Go to Transactions in your dashboard
- Click Manage fields at the top of the transaction table
- Click Add field
- Give it a clear name, like Project or Cost Centre
- Choose a Field type: Text or Dropdown
- For a dropdown, add the choices people can pick from. Click Add option for each one, and give each a colour so they’re easy to spot in the table
- Click Create
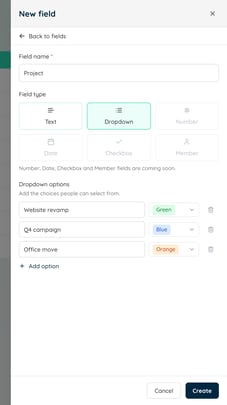
Your new field appears as a column in the transaction table straight away.
⚠️ Choose the field type carefully. It can’t be changed after the field is created. If you need a different type, create a new field.
✍️ Fill in a field on a transaction
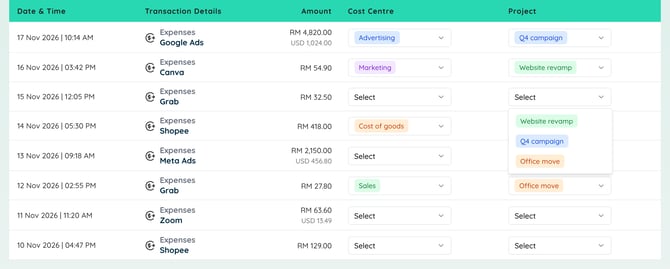
- Go to Transactions
- Find the transaction and the column for your field
- Click Select to pick a dropdown option, or type in a text field
That’s it. The value is saved to that transaction.
📱 On mobile? Custom fields are coming to the Swipey app soon. For now, fill them in from the dashboard.
⚙️ Edit, hide or delete a field
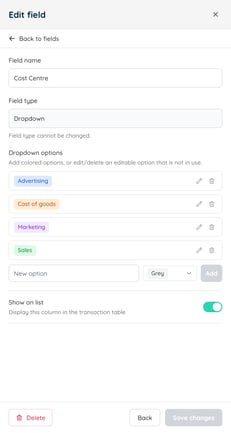
Open Manage fields and click any field to:
- Rename it
- Add dropdown options, or edit or delete an option that isn’t being used on any transaction yet
- Show or hide it in the transaction table with Show on list. Hidden fields keep their values
- Delete it if you no longer need it
📊 See your fields in your export
Every custom field comes through as its own column when you export your transactions to Excel, so you can filter, pivot or hand the file straight to your accountant.
👉 How to export your transactions
❓ Common questions
Can I change a field from Text to Dropdown later?
No. The field type is fixed once it’s created. Create a new field with the type you need.
Why can’t I delete a dropdown option?
It’s already used on at least one transaction. Options can only be deleted when nothing uses them.
What happens to the values if I hide a field?
They stay saved. Hiding only removes the column from the table view.
Do custom fields sync to Xero, QuickBooks or Bukku?
Not at the moment. They’re for your own tracking and reporting in Swipey and your exports.
Running more than one entity?
Custom fields are set up per entity, so each one can track spend its own way. Learn more about Multi-Entity Management.